
Blog
Whole House Deep Cleaning Checklist for Charleston Homes
A whole house deep cleaning checklist is most useful when it helps you make decisions, not when it simply creates a longer list of chores. Charleston homeowners, renters, busy families, and property managers usually need to answer three practical questions: what must be cleaned now, what can wait, and whether the work is realistic to complete without disrupting the household or missing a deadline.
This guide turns deep cleaning into a repeatable process. It separates health and hygiene priorities from cosmetic improvements, explains how to adapt the work for a move or recurring service, and gives you a room-by-room framework you can hand to a cleaner or use for your own Saturday plan. If you are comparing one-time service with ongoing help, BeeLux’s house cleaning in Charleston page is a useful starting point for understanding the local residential service context.
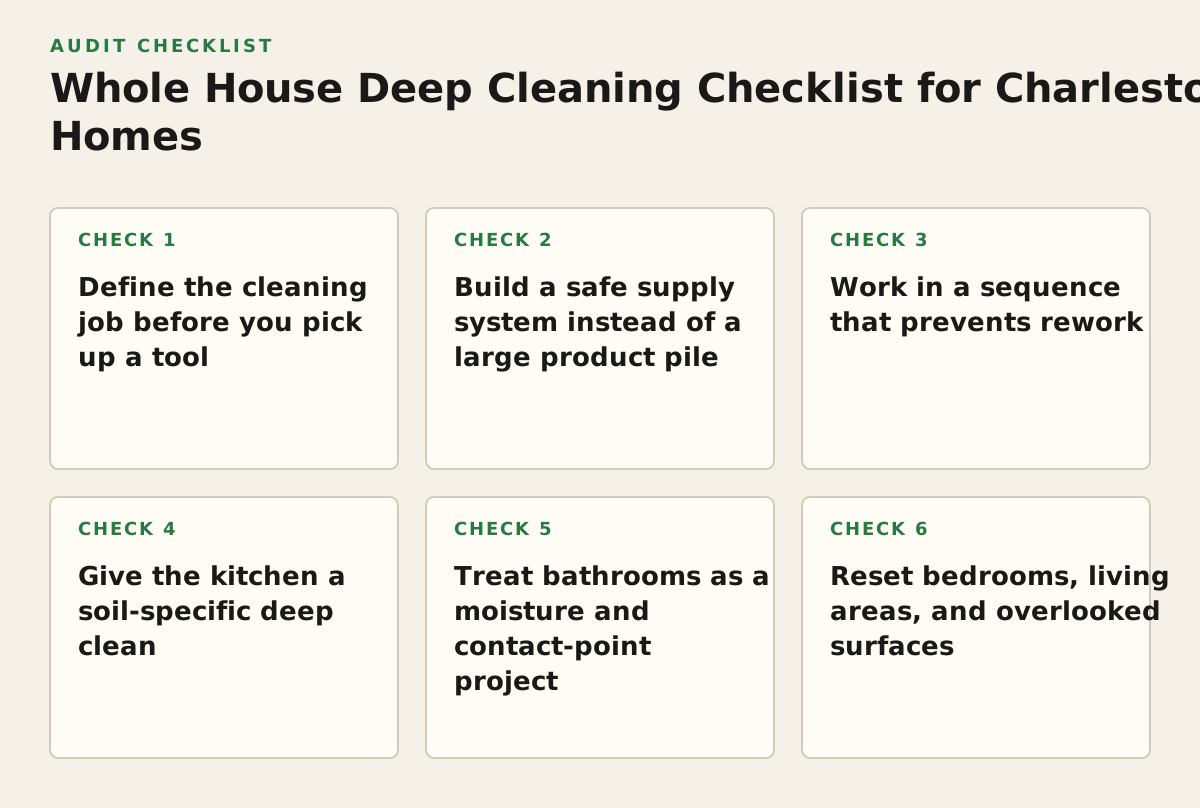
1. Define the cleaning job before you pick up a tool
When this applies: Use this step before a seasonal reset, after illness, before listing a home, between tenants, or when a recurring cleaning routine no longer keeps up with buildup.
The first decision is not “Which room should I start with?” It is “What outcome does this cleaning need to deliver?” A deep clean for a family living in the home has different priorities from a move-out clean. A home being prepared for new occupants should emphasize empty cabinets, appliances, baseboards, and accumulated residue. A lived-in home may need attention to dust reservoirs, neglected surfaces, and high-touch areas without packing away every possession.
Write a short job brief using four details:
- Occupancy: lived-in, vacant, partially furnished, or occupied by tenants.
- Purpose: hygiene reset, appearance improvement, move-in readiness, move-out handoff, or maintenance catch-up.
- Constraints: pets, children, allergies, fragile finishes, limited ventilation, water restrictions, or a narrow deadline.
- Finish standard: visibly refreshed, landlord-ready, guest-ready, or detailed enough for an empty-home turnover.
Why this works: a written outcome prevents low-value work from consuming the day. For example, polishing every interior door may feel productive, but it should not come before removing grease from a range hood, soil from a bathroom floor edge, or dust from return-air grilles.
Failure mode: Treating every task as equally urgent. That produces a clean-looking checklist with no priority order, so the last unfinished items may be the ones that matter most to the next occupant.
Implementation example: A Charleston family preparing for visiting relatives could define its brief as “guest-ready by Saturday evening.” That makes the kitchen, guest bathroom, entry, visible floors, bedding, and living areas the first tier. Interior cabinet tops and the garage become secondary unless time remains.
Use three task tiers
- Tier one—required: sanitation concerns, visible soil, odors, sticky residue, spills, and areas tied to a move or inspection.
- Tier two—high value: dust on trim, doors, vents, ceiling fans, under furniture, and reachable light fixtures.
- Tier three—optional: organizing, exterior windows, high ladders, grout restoration, upholstery extraction, and projects requiring specialized equipment.
Do not silently add repairs to the cleaning brief. A stained surface, damaged caulk line, peeling paint, corroded fixture, or broken appliance may need maintenance rather than more scrubbing. Recording that distinction helps a homeowner, property manager, or cleaner avoid damaging a finish while trying to achieve an impossible result.
2. Build a safe supply system instead of a large product pile
When this applies: Always, especially when several people are cleaning, different products are being used, or the home includes children, pets, older adults, or anyone with respiratory sensitivities.
A deep clean needs enough tools to remove soil efficiently, but more products do not automatically produce a better result. Start with a small system: microfiber cloths, a vacuum with appropriate attachments, a mop, disposable or washable gloves, scrub pads suited to the surface, a bucket, trash bags, and labeled products chosen for the material being cleaned.
Read each product label and follow its directions for use, ventilation, contact time, and protective equipment. The Occupational Safety and Health Administration explains that hazard communication includes information such as labels, safety data sheets, and employee training; its Hazard Communication page is a suitable reference when a household or property team is handling commercial chemicals. This matters because a product can be appropriate for one surface and unsafe or ineffective on another.
Why this works: Separating tools by use reduces cross-contamination and prevents the “one rag for the whole house” problem. It also makes the work measurable: a clean cloth should stay clean long enough to pick up soil rather than redistribute it.
Failure mode: Mixing chemicals or improvising combinations. In particular, never combine bleach with ammonia or acidic products. If a label is missing, the container is unmarked, or the directions are unclear, set it aside rather than guessing.
Implementation example: Prepare one bathroom caddy, one kitchen caddy, and one general-surface kit. Keep toilet tools separate from kitchen cloths. Put clean cloths on one side of the cart and used cloths in a washable bag on the other. This simple physical separation is more reliable than trying to remember which cloth touched which fixture.
Use a surface compatibility check
- Test an unfamiliar product in a hidden area first.
- Use the least aggressive method that can remove the soil.
- Do not use abrasive pads on polished stone, delicate coatings, painted cabinetry, or glossy appliances without confirming compatibility.
- Protect unfinished wood, unsealed grout, and electronics from excess moisture.
- Keep labels available when another person may continue the job.
For product selection, the EPA’s Safer Choice program explains how products can be evaluated against ingredient and performance criteria. That does not eliminate the need to read a label or assess a surface, but it gives households and property teams a way to look for products identified through an EPA review process rather than relying only on marketing language.
3. Work in a sequence that prevents rework
When this applies: Use this sequence for a whole-home clean, particularly when ceilings, fans, trim, floors, and multiple rooms are involved.
The most reliable order is declutter, dry clean, wet clean, then floors. Within a room, work from high to low and from cleaner areas toward dirtier areas. The point is mechanical: dust and loosened debris fall downward, while wet cleaning can move soil from one surface to another if it happens too early.
- Remove trash, laundry, dishes, and objects that block surfaces.
- Dust high surfaces, ceiling fans, vents, door tops, shelves, and light fixtures when safely reachable.
- Vacuum upholstery, edges, corners, rugs, and floors before mopping.
- Clean glass, counters, doors, trim, and other wet-cleaning surfaces.
- Finish with floors, working from the farthest room toward the exit.
- Ventilate as appropriate and inspect the room under normal lighting.
Why this works: It reduces the chance that a freshly cleaned floor will receive falling dust or footprints. It also creates a natural route through the home, which is helpful when a household must remain partially operational.
Failure mode: Starting with the most visible floor. A freshly mopped floor becomes a staging area for ladders, buckets, vacuum hoses, and falling debris, so the cleaner has to repeat the work.
Implementation example: In a two-story home, gather supplies upstairs first, complete the dry work on the second floor, wet-clean those rooms, and finish the upstairs floors. Then move downstairs and finish at the entry. If residents need access to the stairs, clean alternate sections and allow safe drying rather than blocking the only route.
Room-entry checklist
- Open curtains or turn on sufficient lighting so residue is visible.
- Move small items instead of cleaning around them.
- Photograph or note pre-existing damage in a rental or managed property.
- Keep a “needs repair” list separate from the cleaning list.
- Close completed rooms when possible to prevent pets, children, or foot traffic from undoing the work.
For homes with a known mold problem, do not treat a broad checklist as a remediation plan. The EPA’s mold cleanup guidance distinguishes ordinary cleaning from situations requiring containment, protective measures, moisture control, or professional assessment. The practical rule is to address the moisture source and escalate when the material, area, or occupant risk exceeds ordinary household cleaning.
4. Give the kitchen a soil-specific deep clean
When this applies: Prioritize this section before hosting, after a long period of takeout or heavy cooking, during a move-out, or when sticky residue and odors persist despite routine wiping.
Kitchens collect several types of soil at once: grease, food particles, mineral deposits, fingerprints, dust, and crumbs. Each responds differently. A degreaser may help with a range hood but be unsuitable for a porous countertop. A dry vacuum is better for crumbs in a drawer track than a wet cloth that turns them into paste.
Kitchen checklist
- Clear counters, discard expired items, and wipe the backsplash and wall area behind appliances.
- Clean cabinet fronts, handles, edges, and the underside of upper cabinet ledges.
- Vacuum crumbs from drawers, cabinet corners, toe-kicks, and appliance gaps.
- Clean the refrigerator exterior, door seals, shelves, drawers, and interior walls when included in the job.
- Wipe the oven door, cooktop, control panel, and range hood exterior using compatible products.
- Clean the microwave interior, turntable, handle, and underside of the door.
- Scrub the sink basin, faucet base, drain area, and backsplash.
- Wipe trash and recycling bins, then clean the floor beneath them.
- Vacuum and mop under reachable appliances only when it can be done safely.
Why this works: The order follows the location of buildup. Dry debris is removed before moisture spreads it; high cabinet and appliance surfaces are cleaned before counters and floors; food-contact surfaces receive product treatment appropriate to the material.
Failure mode: Assuming a strong-smelling product equals a clean kitchen. Odor can mask residue, and aggressive scrubbing can dull a finish or damage a seal. A better verification is a clean cloth pass on handles, edges, and the counter backsplash after the product has been removed.
Implementation example: For a move-out kitchen, empty every drawer and cabinet first. Vacuum corners, wipe interiors, clean fronts and handles, then address appliances and floors. For a lived-in home, leave one food-preparation zone available until the final stage so the household is not forced to work around wet surfaces.
Food safety also changes the standard. The U.S. Department of Agriculture’s food safety basics guidance emphasizes keeping food-contact areas clean and avoiding cross-contamination. Apply that principle operationally: use separate cloths for the toilet area and kitchen, wash hands after handling waste, and do not place cleaned utensils on a surface that has not been rinsed as directed by the product label.
5. Treat bathrooms as a moisture and contact-point project
When this applies: Use the full bathroom sequence for move-in, move-out, guest preparation, recurring cleaning catch-up, or any bathroom with soap film, hair, mineral deposits, or persistent odor.
Bathrooms reward a controlled order. Apply an appropriate product to fixtures that need dwell time, but do not let it dry on a surface unless the label specifically permits that. While the product works, remove dry hair and dust, clean mirrors and high surfaces, then return to scrub and rinse where required.
Bathroom checklist
- Remove towels, bath mats, toiletries, trash, and removable shower items.
- Dust exhaust-fan covers, ledges, light fixtures, door tops, and trim when safely reachable.
- Clean the mirror and glass, then inspect edges and corners for streaks.
- Scrub the shower walls, tub, fixtures, door tracks, shelf undersides, and drain cover.
- Clean the toilet exterior from cleaner areas toward the base, then clean the bowl with a dedicated tool.
- Wipe the vanity top, backsplash, cabinet fronts, handles, and drawer pulls.
- Remove hair and debris from floor edges before wet cleaning.
- Wash or replace bath mats according to their care instructions.
- Finish with the floor, leaving a safe route out of the room.
Why this works: It addresses both visible appearance and the places where moisture and touch accumulate. Cleaning the exhaust-fan cover and shower edges can matter more than repeatedly polishing a faucet, because neglected airflow and wet perimeter areas affect how quickly a bathroom feels dirty again.
Failure mode: Scrubbing harder without allowing the product to work. Pressure can scratch a finish while leaving mineral scale or soap film in place. If buildup remains after correct application and rinsing, the issue may require a compatible specialized product or repair rather than unlimited force.
Implementation example: In a vacant move-in bathroom, remove every shelf item and clean inside the vanity, behind the toilet, the shower track, and the floor perimeter. In a family bathroom that must remain usable, clean one bathroom completely before closing it and keep another available.
Do not assume every dark spot is ordinary soil. If there is extensive growth, recurring moisture, water damage, or a strong musty odor, pause the cosmetic checklist and identify the source. Ordinary cleaning cannot substitute for moisture correction or professional remediation when the underlying condition continues.
6. Reset bedrooms, living areas, and overlooked surfaces
When this applies: This section matters during allergy-conscious dust reduction, seasonal cleaning, guest preparation, and move-in work where furniture placement may hide accumulated debris.
These rooms often look clean because their soil is distributed across many small reservoirs: blinds, fan blades, upholstery seams, baseboards, electronics, under-bed edges, and the top of tall furniture. A checklist should make those locations explicit rather than relying on what is visible from standing height.
Living and bedroom checklist
- Strip beds, launder linens as appropriate, and vacuum mattress surfaces if suitable for the material.
- Dust ceiling fans, lamps, vents, blinds, curtain rods, and reachable light fixtures.
- Vacuum upholstery seams, under cushions, pet-hair zones, and rug edges.
- Wipe door panels, handles, switch plates, railings, and frequently touched surfaces.
- Clean baseboards, window sills, tracks, and the area behind accessible furniture.
- Vacuum under beds, sofas, and tables when the furniture can be moved safely.
- Wipe desk surfaces, remote controls, and electronics only with methods approved for those items.
- Clean mirrors, frames, shelves, and decorative objects before returning them.
- Finish with the floor, including corners and transitions between flooring types.
Why this works: The method targets dust collection points and touch points separately. Dry dusting or vacuuming preserves the distinction between loose particulate and sticky residue, while moving furniture exposes the perimeter that routine cleaning misses.
Failure mode: Turning deep cleaning into forced decluttering. A cleaner can remove dust from a shelf; deciding what a family should discard is a separate household decision. Mixing the two tasks makes the cleaning slower and can create conflict over belongings.
Implementation example: Before a recurring service begins, a family can designate a “clear-to-clean” zone on each surface. Items left outside that zone remain in place, while the cleaner can fully wipe the exposed area. This preserves control without requiring the entire home to be organized first.
For households managing respiratory concerns, avoid creating unnecessary airborne dust. Use a vacuum with a suitable filtration system if available, damp-clean compatible surfaces after dry removal, and ventilate according to product directions and weather conditions. The goal is controlled soil removal, not simply making dust visible in the air.
7. Adapt the checklist for move-in, move-out, and recurring service
When this applies: Choose the version that matches occupancy and accountability. The same home can require three different checklists at three different points in its life.
Move-in cleaning should focus on surfaces the new occupant will encounter before furniture and boxes block access. Empty cabinets, drawers, closets, appliances, bathroom storage, floors, and high ledges are easier to clean before belongings arrive.
Move-out cleaning should focus on the documented condition of the property and the areas that become visible after possessions leave. Photographing existing damage before cleaning is helpful for separating maintenance conditions from cleaning omissions, especially in a rental or managed property.
Recurring cleaning should not repeat every deep-clean task every visit. Its role is to prevent ordinary soil from becoming heavy buildup, while a periodic deep clean handles neglected or difficult areas. A practical recurring scope may rotate tasks such as fan blades, baseboards, cabinet fronts, and under-furniture vacuuming rather than attempting all of them at every visit.
| Job type | First priority | Defer or rotate | Verification example |
|---|---|---|---|
| Move-in | Empty storage, appliances, bathrooms, floors, touch points | Areas blocked by delivered furniture; cosmetic projects | Open each cabinet and closet, inspect floor edges, check appliance interiors |
| Move-out | Visible soil, empty rooms, kitchen and bath details, documented condition | Personal organization and occupied-home convenience tasks | Walk the property room by room against the lease or turnover scope |
| One-time deep clean | Highest-soil rooms, neglected surfaces, odor sources, high-touch areas | Repairs, restoration, unsafe heights, specialty extraction | Compare the completed room with the original job brief |
| Recurring service | Maintenance of kitchens, bathrooms, floors, and touch points | Rotating deep-detail tasks unless specifically scheduled | Keep a rotation list and note areas that repeatedly rebuild soil |
| Multiple properties | Standardized scope, access, supplies, and condition documentation | Unapproved extras and assumptions about repairs | Use the same room sequence and completion checklist at each address |
Why this works: It matches labor to the property’s stage. Empty homes offer access but demand detail; occupied homes require coordination and realistic limits; recurring service works by controlling the rate of buildup rather than resetting every surface from zero.
Failure mode: Sending the same generic checklist to every job. That creates disputes when a tenant expects inside-appliance cleaning, a family expects uninterrupted access, or a property manager needs condition notes rather than merely a pleasant appearance.
Implementation example: A property owner with several Lowcountry homes can create a base checklist for every address, then add a property-specific sheet for flooring, appliance condition, access instructions, and known maintenance issues. A recurring household can instead keep a short core list plus one rotating detail category per visit.
When the project is larger than a realistic household block of time, request a written scope before service begins. BeeLux’s deep cleaning in Charleston page can help Charleston-area homeowners evaluate whether a one-time deep cleaning is a better fit than trying to divide the work across several uncertain weekends.
8. Use a completion check that measures the right things
When this applies: Use a final inspection for move deadlines, property turnover, delegated household work, or any job where “done” needs to mean more than “I am tired.”
A completion check should be short, visual, and tied to the original purpose. It is not a second full cleaning pass. Walk the home in the same direction used during the work and inspect from the height and viewpoint of the person who will use or evaluate the room.
Final inspection questions
- Are there visible crumbs, hair, dust lines, streaks, or sticky spots?
- Were touch points such as handles, switches, railings, and appliance controls addressed?
- Are floors free of debris and safe to walk on?
- Were empty cabinets, drawers, closets, and appliance interiors included when the job required them?
- Are cleaning products, tools, waste, and temporary protective materials removed?
- Did any surface show damage, discoloration, or a condition that needs maintenance?
- Does the home meet the stated purpose: occupied-home reset, guest-ready, move-in, or move-out?
Why this works: It tests the result against the decision that started the job. A move-out inspection emphasizes empty storage and visible condition; a recurring visit emphasizes maintenance of the core rooms; a guest-ready reset emphasizes the paths and spaces visitors will actually use.
Failure mode: Using shine as the only standard. Gloss can hide streaks, residue, or missed edges. A better inspection combines sight, touch where appropriate, odor awareness, and opening the storage areas included in the scope.
Implementation example: For a move-out, stand at the entry and follow the tenant or inspector’s likely path: entry, living area, kitchen, bedrooms, bathrooms, closets, and utility spaces. Mark only three categories—cleaning remaining, repair needed, and outside scope—so the next action is clear.
Implementation plan: schedule the clean in the right order
- Write the job brief. Record the purpose, occupancy, deadline, rooms included, special surfaces, and any known damage or moisture issue.
- Choose the scope. Select move-in, move-out, one-time deep cleaning, recurring maintenance, or a multi-property version. Add inside appliances, cabinets, closets, or rotating details only when they are explicitly needed.
- Prepare the property. Remove trash, dishes, laundry, and personal items that block the surfaces being cleaned. Secure pets and make a safe route through the home.
- Prepare the tools. Separate bathroom and kitchen tools, label products, check surface compatibility, and set aside any damaged or unidentified chemical container.
- Start with dry work. Declutter, dust from high to low, vacuum upholstery and edges, and expose the areas that routine cleaning misses.
- Clean by room priority. Complete the kitchen and bathrooms according to the job brief, then reset bedrooms, living areas, hallways, and entry zones. Keep the most important rooms ahead of optional details.
- Finish floors last. Work toward the exit, protect safe access, and allow surfaces to dry as directed.
- Inspect against the purpose. Open included cabinets and closets, check touch points and floor edges, and separate cleaning omissions from maintenance or restoration needs.
- Record the next cycle. For recurring service, note what rebuilt soil and what can rotate. For a property portfolio, save the same standardized checklist with property-specific additions.
For Charleston homeowners who want to outsource the work, the most useful request is a clear scope tied to the home’s condition and purpose. BeeLux Cleaning provides flat-rate residential house cleaning, deep cleaning, and move-in or move-out cleaning in Charleston and surrounding Lowcountry communities, with online booking and pricing provided before commitment; use BeeLux Cleaning when a defined one-time or recurring plan is more practical than managing the checklist alone.
Authored with NotFair SEO