
Blog
Move-in Cleaning Checklist: A Room-by-Room Plan for Charleston Homes
A move-in cleaning checklist helps you decide what must be cleaned before boxes, beds, and appliances make the work harder. For a Charleston-area renter, homeowner, property manager, or busy family, the practical decision is not whether every surface can be scrubbed—it is which work should happen while the home is empty, which tasks need specialized attention, and what can wait for routine cleaning. This guide turns that decision into a room-by-room process, with priorities for homes between tenants, newly purchased properties, and households arranging recurring service after the move.
Empty rooms create access. You can clean behind appliances, inside cabinets, along baseboards, and under bathroom fixtures without moving someone else's belongings. That advantage disappears quickly after delivery day. The checklist below is designed to prevent the common mistake of spending an hour polishing visible surfaces while leaving high-contact areas, construction dust, old grease, or move-in debris behind.
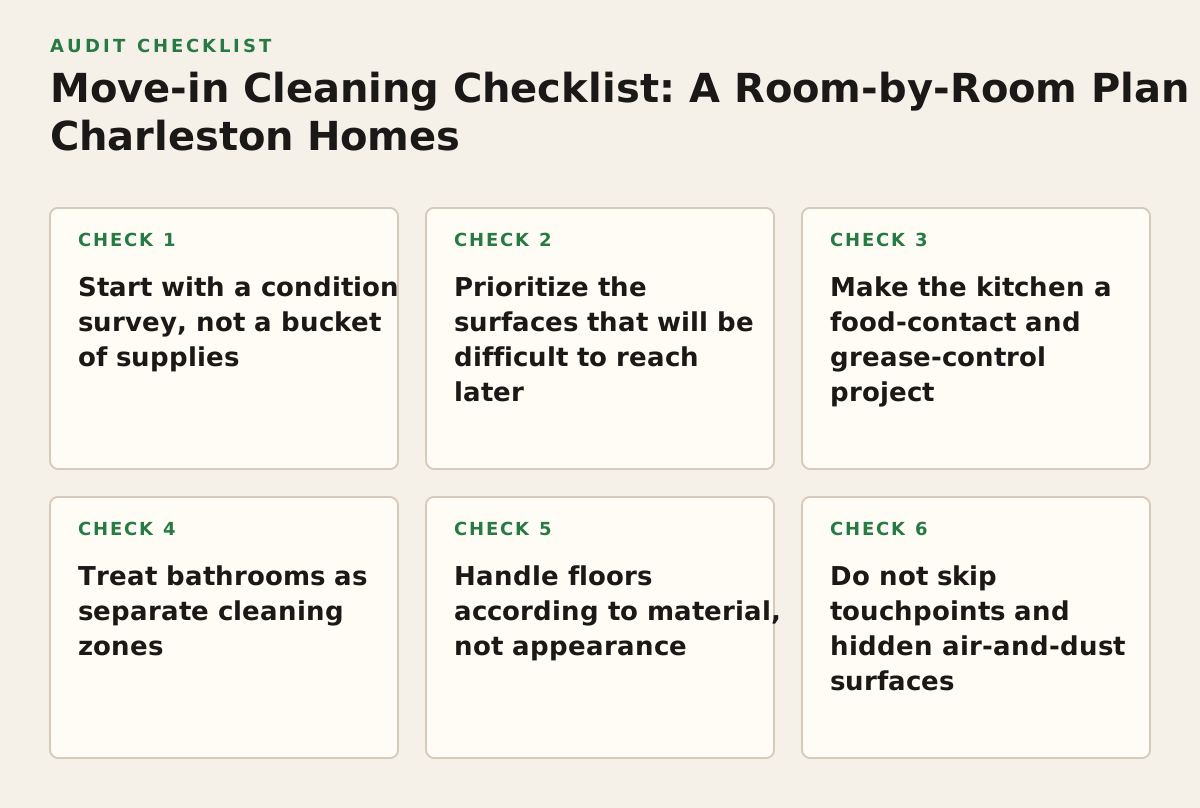
1. Start with a condition survey, not a bucket of supplies
When it applies: Use this step before cleaning a rental, recently renovated house, inherited property, vacant listing, or home where the previous occupants left behind more than expected.
Why it works: A short survey separates ordinary cleaning from problems that require documentation, maintenance, or a different service. It also gives you a logical route through the home. Photographing the condition before work is especially useful for renters: it creates a time-stamped record of stains, damaged finishes, missing items, or pre-existing buildup without confusing those issues with cleaning quality.
Walk the property with the electricity and water on if possible. Open every cabinet and closet, look behind doors, and note surfaces that are inaccessible or unsafe to clean. In a Charleston-area home, also look for signs that moisture has affected closets, bathrooms, window areas, or HVAC-adjacent surfaces. Do not assume that a dark spot is ordinary dirt. The EPA advises that mold cleanup depends on the size and situation of the affected area, and that moisture control is central to preventing recurrence; see its mold cleanup guidance before treating a suspected growth as a routine wipe-down.
Record four categories
- Cleanable soil: dust, crumbs, fingerprints, soap film, hair, grease, and tracked-in grit.
- Damage: chipped paint, swollen flooring, cracked caulk, broken blinds, damaged screens, or scratched appliances.
- Maintenance: leaks, slow drains, loose toilet seats, nonworking lights, missing filters, or an appliance that does not operate.
- Special handling: suspected mold, pest evidence, heavy smoke residue, lead-paint concerns, bodily fluids, or substantial renovation dust.
Failure mode: Treating every visible issue as a cleaning task. A cleaner can remove surface soil, but cleaning will not repair a leaking supply line or make a damaged countertop look new. If an older home has deteriorating painted surfaces, avoid aggressive scraping or sanding; EPA guidance identifies older paint as a potential lead source and recommends precautions for renovation and repair work. Review the EPA’s lead-source guidance when that concern applies.
Implementation example: Before moving into a two-bedroom Mount Pleasant rental, a tenant photographs a stained bedroom wall, a greasy oven, dusty closet shelves, and a loose bathroom exhaust grille. The oven and shelves go on the cleaning list. The stained wall and grille go into the condition report for the landlord or manager. That distinction protects the tenant and keeps the cleaning plan realistic.
2. Prioritize the surfaces that will be difficult to reach later
When it applies: This principle matters most when the home is vacant or when furniture delivery is scheduled after cleaning. It is also useful for property managers who need a repeatable turnover standard across several homes.
Why it works: Cleaning effort has a different value before and after occupancy. Dusting an open floor is easy later; washing the floor beneath a refrigerator after it is loaded with food is inconvenient and may not be safe. The first pass should therefore favor access-dependent tasks, not the most visible tasks.
Use an access-first order
- Ceilings, ceiling fans, vents, high ledges, and the tops of cabinets.
- Inside cabinets, drawers, closets, pantry shelves, and medicine storage.
- Walls, doors, trim, baseboards, window sills, tracks, and screens where appropriate.
- Appliance sides, backs, drip pans, seals, and the floor beneath or behind movable units.
- Bathroom fixtures, tile, grout, exhaust covers, and the floor perimeter.
- Floors, with vacuuming before damp mopping.
Work from high to low because loosened dust falls. Work from dry to wet because damp soil spreads more easily and makes it harder to tell whether a surface is actually clean. For delicate finishes, test an inconspicuous area first. A strong degreaser that works on an uncoated metal range hood may dull painted cabinetry or damage natural stone.
Failure mode: Starting with floors because they look dirty. Foot traffic, ladders, dust from vents, and cabinet debris will soil them again. The better sequence is to finish overhead and vertical surfaces first, then complete floors as the final room-level task.
Implementation example: In a vacant North Charleston townhouse, the cleaner removes refrigerator drawers, vacuums the condenser-area floor only if the manufacturer’s instructions permit access, wipes cabinet interiors, cleans door edges, and finishes with the flooring. Once the refrigerator and moving boxes arrive, the most time-consuming access work is already complete.
3. Make the kitchen a food-contact and grease-control project
When it applies: Give the kitchen extra attention when a home has changed occupants, an oven was heavily used, cabinets feel tacky, or the refrigerator is being transferred to a new household.
Why it works: Kitchen soil is layered. Dry crumbs and dust can be removed mechanically, while grease often needs dwell time and the correct product. Food-contact surfaces also deserve a separate final pass. The U.S. Department of Agriculture recommends keeping a refrigerator at or below 40°F and a freezer at 0°F for food safety; its refrigeration guidance is a reminder that a clean appliance is only one part of preparing it for food storage.
Kitchen sequence
- Remove crumbs and loose debris from drawers, cabinet corners, appliance gaps, and the pantry.
- Wash cabinet handles and the areas around them, then clean cabinet interiors if included in the service scope.
- Clean the refrigerator shelves, drawers, door seals, and interior walls after removing food.
- Degrease the cooktop, backsplash, hood exterior, oven door, and nearby cabinet faces using finish-appropriate products.
- Wash the sink basin, faucet, drain area, and counter edges; rinse product residue from food-contact areas.
- Vacuum and mop beneath movable appliances only when they can be moved safely and without disconnecting gas or water.
Do not mix cleaning chemicals. Never assume that “more product” means “more cleaning.” Follow the label for dilution, ventilation, contact time, and whether a surface must be rinsed. The EPA’s Safer Choice program explains how products can be evaluated for ingredient and performance considerations; it does not mean every product is appropriate for every stone, wood, appliance finish, or household need.
Failure mode: Spraying a multipurpose cleaner directly into switches, outlets, appliance controls, or porous wood. Apply product to a cloth where appropriate, keep moisture controlled, and follow the appliance or surface manufacturer’s instructions.
Implementation example: A family moving into a James Island home has an empty refrigerator and a range with baked-on residue. The priority is not polishing the cabinet doors first. It is removing loose debris, allowing the oven-safe product to dwell as directed, cleaning the refrigerator seals and drawers, rinsing food-contact surfaces, and then completing counters and floors. If the oven residue does not release without scraping that could damage the finish, the homeowner records it as a limitation rather than escalating chemicals.
4. Treat bathrooms as separate cleaning zones
When it applies: Use a zone-by-zone bathroom plan for every move-in, but increase the inspection level when grout is darkened, caulk is failing, ventilation is poor, or a property has been vacant.
Why it works: Bathrooms combine hard-water deposits, soap film, hair, body oils, and high-touch surfaces in a small area. A room can look bright while the less visible points—hinges, toilet bases, drawer corners, exhaust covers, and the underside of a vanity—remain dirty. Splitting the room into zones prevents the toilet brush or bathroom cloth from being carried into cleaner areas.
Bathroom zones to assign
- Wet zone: shower walls, tub, doors, tracks, fixtures, drains, and grout lines.
- Toilet zone: bowl, seat hinges, exterior, base, flush handle, nearby wall, and floor perimeter.
- Sink zone: basin, faucet aerator area, backsplash, vanity top, drawer pulls, and cabinet interior.
- Touch zone: door knobs, light switches, towel bars, toilet-paper holder, and cabinet handles.
- Air and dust zone: exhaust grille, ceiling corners, window ledge, and baseboards.
Apply products according to the surface. Acidic products may help with mineral deposits but can harm natural stone or some metal finishes. Abrasive pads can scratch acrylic tubs, glass, chrome, and coated fixtures. Letting an appropriate product dwell is usually safer than applying more force, but the label’s contact-time direction controls.
Failure mode: Confusing discoloration with removable soil. Cracked caulk, permanently etched glass, damaged grout, and rusted fixtures may not return to a like-new appearance through cleaning. Note the boundary between cleaning and repair before promising an outcome.
Implementation example: For a vacant bathroom in West Ashley, the sequence is shower and tub, vanity interior, sink and faucet, toilet, touchpoints, mirrors, and floor. The cleaner uses separate cloths or color-coded materials for toilet and general surfaces, then inspects from a low angle for hair, streaks, and missed floor edges.
5. Handle floors according to material, not appearance
When it applies: This is essential in homes combining hardwood, luxury vinyl, tile, carpet, concrete, or natural stone. It also matters when renovation dust or fine sand has been tracked through the property.
Why it works: “Floor cleaner” is not one universal category. Excess water can affect wood and some seams; the wrong chemical can leave a film on vinyl or damage stone; aggressive scrubbing can dull a finish. The cleaning method should follow the flooring material, finish, manufacturer guidance, and actual soil level.
| Condition or material | Priority action | Use caution with | Illustrative acceptance check |
|---|---|---|---|
| Hardwood or engineered wood | Dry soil removal, then a controlled, lightly damp method approved for the finish | Standing water, steam, abrasive pads, and unapproved polish | No visible grit along edges; no wet sheen or residue |
| Luxury vinyl or sheet vinyl | Vacuum or sweep, spot-treat soil, then damp mop with a compatible product | Wax buildup, solvent-heavy products, and excess water at seams | Surface feels clean rather than sticky |
| Tile and grout | Remove dry debris, treat soil or deposits, agitate grout selectively, rinse or extract residue | Acid on sensitive tile or stone; dirty mop water spread across the room | Grout lines are consistent, with known permanent stains recorded |
| Carpet | Vacuum slowly in multiple directions and spot-treat according to fiber and stain type | Over-wetting, aggressive rubbing, and treating unknown stains with incompatible chemicals | No loose debris in corners; spots are documented if they remain |
| Concrete or sealed stone | Identify the sealer, remove grit, and use a neutral compatible method | Unapproved acids, bleach, abrasives, and prolonged moisture | No cloudy film, streaking, or new surface damage |
Failure mode: Mopping every floor with the same bucket and solution. That spreads soil and may transfer a product intended for tile onto wood or stone. Change water when it becomes visibly dirty, use separate tools for different zones, and stop when a material’s care instructions are unknown rather than guessing.
Implementation example: A newly purchased Charleston-area home has tile in the entry, engineered wood in the living room, and carpet in the bedrooms. The plan vacuums all rooms first, uses a controlled tile treatment at the entry, uses minimal moisture on the wood, and performs slow edge-focused carpet vacuuming. The final inspection checks transitions, corners, and the floor behind doors—not just the center of each room.
6. Do not skip touchpoints and hidden air-and-dust surfaces
When it applies: Prioritize this category when many people will occupy the home soon, when the previous occupants had pets, or when dust is visible around vents, doors, and trim.
Why it works: Move-in cleaning is partly about resetting the surfaces people contact immediately. Door knobs, switches, drawer pulls, railings, appliance handles, and toilet flush handles are easy to overlook because they are small. Dust also collects in places that are outside normal eye level. The CDC distinguishes cleaning from disinfecting and explains that cleaning removes dirt and many germs, while disinfecting uses chemicals to kill germs on surfaces; see its home cleaning and disinfecting guidance for when disinfecting is appropriate.
Use a touchpoint sweep after room cleaning
- Exterior and interior door handles, locks, and push plates.
- Light switches, thermostat controls, remote controls, and stair railings.
- Cabinet pulls, refrigerator handles, microwave buttons, and washer controls.
- Toilet handles, faucet handles, shower controls, and towel bars.
- Window latches, blind controls, and frequently used closet handles.
Disinfecting is not automatically better for every surface or every household. A clean, visibly soil-free surface may not need disinfection, while a household with someone at higher risk of severe illness may choose a more deliberate approach. Always check label directions, allow the required wet contact time, ventilate appropriately, and never combine disinfectants.
For vents and returns, remove loose dust from accessible covers without opening HVAC equipment or disturbing insulation. Replace or clean a filter only when the system and filter instructions allow it. Cleaning a grille does not correct an airflow, moisture, or indoor-air problem.
Failure mode: Spraying a disinfectant and wiping it away immediately. If the label requires a surface to remain visibly wet for a specified period, removing it at once may prevent the product from working as directed. The operational fix is to clean first, use a manageable section size, and follow the label.
Implementation example: Before a family arrives at a Summerville home, the cleaner completes each room, then carries a written touchpoint list. The final pass covers the front door, stair rail, switches, thermostat, appliance handles, bathroom hardware, and bedroom doors. This takes less time than discovering missed touchpoints while unpacking.
7. Match the checklist to the service decision
When it applies: Use this decision when you are choosing between doing the work yourself, booking a one-time residential cleaning, requesting deep cleaning, or arranging a recurring service after occupancy.
Why it works: A checklist is useful only when it matches the property’s condition and deadline. Standard cleaning is usually suited to maintained surfaces and recurring upkeep. A vacant home with accumulated grease, neglected bathrooms, interior cabinetry, detailed baseboards, and heavy dust may justify a deeper scope. A move-out may require an entirely different emphasis: empty cabinets, appliance interiors, floors, and a documented final condition.
For a local homeowner comparing options for house cleaning in Charleston, separate the request into three parts:
- Required before occupancy: work that affects hygiene, access, food storage, bathrooms, or the ability to unpack cleanly.
- Valuable but deferrable: details such as a second pass on interior windows, decorative dusting, or low-priority storage areas.
- Outside ordinary cleaning: repairs, pest treatment, hazardous contamination, high inaccessible areas, heavy construction cleanup, or mold remediation.
Failure mode: Asking for “everything” without defining the property’s condition or desired result. That phrase can mean a light reset to one person and a restoration-level project to another. A clearer request names the home’s size, occupancy status, rooms needing attention, appliance interiors, cabinets, floors, and known problem areas.
Implementation example: A property owner managing several Lowcountry homes creates two scopes. The turnover scope covers empty cabinets, bathrooms, kitchen appliances, floors, touchpoints, and a condition report. The recurring scope covers occupied-room maintenance, kitchen and bathroom upkeep, dusting, vacuuming, and mopping. A neglected property is referred for a one-time deep cleaning before it enters the recurring schedule. Homeowners who need more intensive attention can review options for deep cleaning in Charleston before selecting the service level.
Decision rule: If furniture blocks the surfaces you need cleaned, the home has accumulated soil beyond routine maintenance, or the next occupant will judge the property immediately, schedule the detailed work before move-in rather than trying to recreate empty access later.
8. Build a final inspection that another person can follow
When it applies: Use a final inspection for your own move, a rental handoff, a property-management turnover, or any cleaning appointment where several people share responsibility.
Why it works: “Looks clean” is too vague to audit. A repeatable inspection uses the same route and checks the same failure points each time. It also separates an incomplete task from a surface limitation. A stain that remains after appropriate treatment is different from a dusty baseboard that was never addressed.
Inspect in this order
- Enter from the front door and check the entry floor, handle, switches, closet, and visible corners.
- Move clockwise through each room, checking high surfaces, vertical surfaces, touchpoints, furniture-free edges, and floors.
- Open every cabinet, drawer, closet, and appliance door included in the scope.
- Inspect bathrooms from the doorway, then at sink height and floor level.
- Check kitchen counters, appliance handles, cabinet edges, sink area, and floor transitions.
- Walk the home with natural light or a portable light angled across surfaces to reveal streaks and dust.
- Photograph unresolved damage or limitations and assign the next action: reclean, repair, document, or leave as-is.
Failure mode: Inspecting only at standing height and under bright overhead lights. That misses hair behind toilets, dust on trim, streaked mirrors, debris in drawer corners, and residue visible from a window. A low-angle light and open-door inspection catch more than a quick visual scan.
Implementation example: A landlord prepares a turnover sheet with one line per room and columns for cabinets, appliances, fixtures, floors, touchpoints, damage, and sign-off. The cleaner marks incomplete work; the manager records pre-existing damage separately. The next occupant receives a home that is not merely “done,” but checked against a defined scope.
Implementation plan: schedule the work around the move
Use this sequence as a starting policy, then adjust it to the property’s condition, access, delivery schedule, and service scope. The dates below are an illustrative example, not a universal timeline.
- Before access day: Confirm utilities, keys, parking, elevator or gate instructions, occupancy status, and whether appliances and cabinets are empty. Ask the property owner or manager about surfaces that require special products.
- At the first walkthrough: Photograph damage, identify moisture or pest concerns, list rooms and appliances, and decide which tasks are cleaning versus maintenance or remediation.
- Before supplies arrive in the home: Remove leftover trash and loose debris where permitted. Gather labels, manufacturer instructions, gloves, cloths, vacuum attachments, floor-specific tools, and a way to record limitations.
- Clean from high to low: Complete ceilings, fans, vents, ledges, cabinets, closets, doors, trim, and appliance exteriors or interiors included in the scope.
- Finish the kitchen and bathrooms: Allow appropriate products to dwell, rinse where directed, keep toilet-zone tools separate, and inspect food-contact surfaces before placing dishes or food.
- Complete floors last in each room: Use the method appropriate to the material, control moisture, and check edges, transitions, under-door areas, and appliance fronts.
- Run the touchpoint sweep: Clean or disinfect selected high-contact surfaces according to the product label and the household’s needs. Do not mix chemicals.
- Inspect with a written route: Open cabinets and drawers, check low and high surfaces, photograph exceptions, and correct missed work before boxes or furniture arrive.
- Choose the maintenance rhythm: After the initial reset, decide which work belongs in recurring residential cleaning and which occasional tasks should remain on a seasonal or move-related deep-clean list.
If the home is empty and the scope includes detailed kitchens, bathrooms, cabinets, baseboards, floors, and touchpoints, booking a one-time service before delivery can protect the access advantage. BeeLux Cleaning provides flat-rate residential house cleaning, deep cleaning, and move-in or move-out cleaning in Charleston and surrounding Lowcountry communities, with online booking and pricing shown before commitment. For a home that needs a defined reset now and upkeep afterward, BeeLux Cleaning can help you choose between one-time and recurring service.
Authored with NotFair SEO